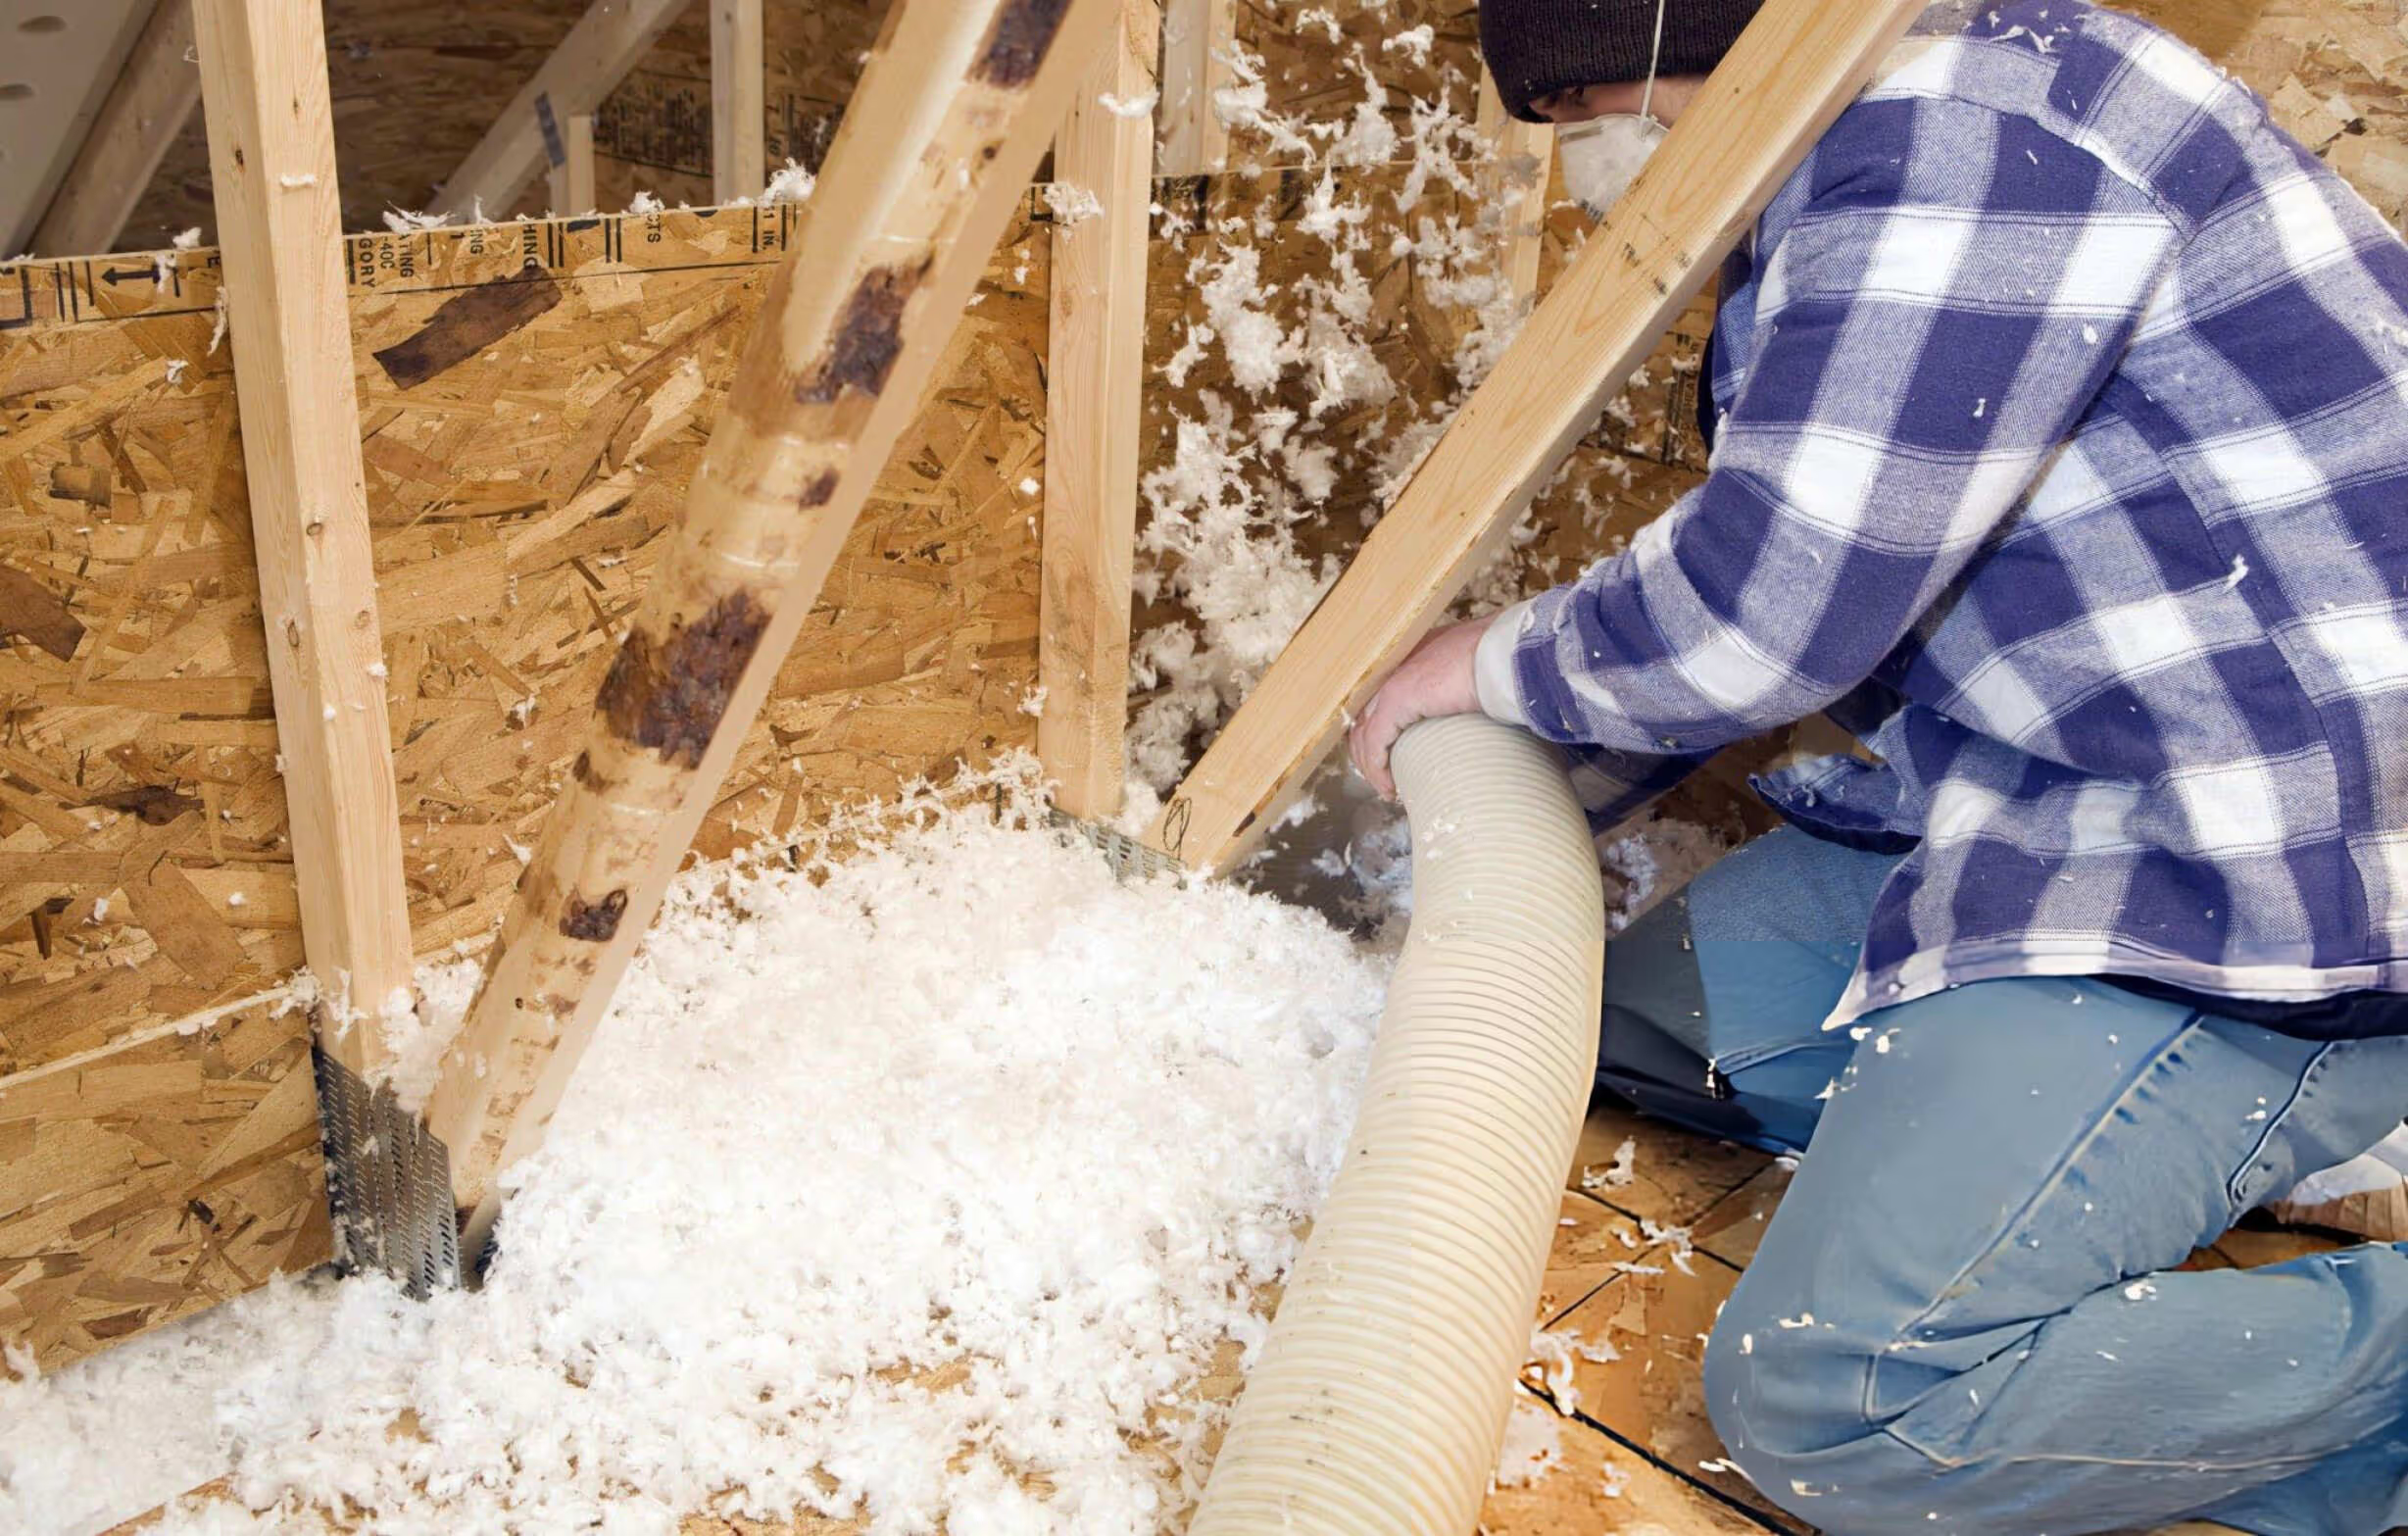
Upgrading attic insulation is one of the most effective ways to cut energy bills, reduce temperature swings, and extend the life of your HVAC system in Lowry Crossing, TX. Blown-in fiberglass attic insulation fills gaps and irregular spaces quickly, creating a continuous thermal barrier that keeps conditioned air where it belongs. For homeowners dealing with hot, humid North Texas summers and occasional cold snaps, the right attic insulation makes indoor comfort consistent while reducing run time on air conditioners and furnaces.

Common attic insulation problems in Lowry Crossing homes
- Inadequate existing insulation depth from older builds or partial renovations
- Compression and gaps from attic traffic or storage, causing cold or hot spots
- Air leaks around recessed lights, plumbing stacks, chimneys, and attic hatches
- Poor attic ventilation combined with insulation gaps, increasing attic heat and moisture risk
- Settling or shifting of loose-fill insulation over time, reducing effective R-value
Types of blown-in insulation we use and why fiberglass
- Loose-fill fiberglass is noncombustible, resists moisture better than some alternatives, and does not settle as much as low-density options.
- Blown-in fiberglass provides fast coverage and performs well when paired with proper air sealing and attic ventilation.
- For homes with high insect or rodent risk, fiberglass combined with rodent barriers and proper sealing reduces future intrusion pathways.
Recommended R-value and insulation depth for Lowry Crossing
- North Texas falls in a climate zone where attic R-values between R-38 and R-60 are commonly recommended for new or upgraded attics.
- Because blown-in fiberglass has an R-value that varies by density, target depths commonly range from roughly 12 to 18 inches depending on existing insulation and product. Exact depth and target R-value are confirmed during a professional attic inspection.
- Older homes with little or no insulation typically see the biggest comfort and savings gains by bringing the attic up to at least R-38.
Inspection and diagnostic process
- Visual attic inspection to measure existing insulation depth, check for moisture, mold, pest damage, roof leaks, and the condition of wiring and recessed fixtures.
- Assessment of attic ventilation, ridge and soffit vents, and baffle placement to ensure airflow is not blocked after insulation is added.
- Air-seal audit to find common leakage points like top plates, chimneys, duct boots, attic hatches, and plumbing/vent stacks.
- Calculation of target R-value and required material volume for a complete coverage estimate.
Step-by-step blown-in installation procedure
- Preparation: secure attic access, move personal storage from edges, and confirm attic walkway and safety measures. Homeowner prep instructions are provided in advance.
- Air sealing: install gaskets, foam, or caulk around penetrations; seal attic hatch and apply baffles where needed to maintain soffit-to-ridge airflow. Air sealing often yields equal or greater energy benefits than insulation alone.
- Ventilation confirmation: verify or install baffles and make sure soffit and ridge vents are unobstructed to prevent moisture build-up.
- Blowing: use professional-grade insulation blowers and hoses to evenly distribute fiberglass to the measured depth. Areas over ducts and chases are treated carefully to avoid burying required clearances to heat-producing fixtures.
- Final inspection: confirm uniform depth across the attic, verify air-seal integrity, and document installed depth and approximate R-value for your records. Cleanup includes removing blown-in dust from the attic access and immediate workspace.
Materials and equipment typically used
- Professional insulation blower and calibrated depth gauges
- Loose-fill fiberglass insulation (tested to industry standards)
- All-purpose attic foam, caulk, gaskets, and HVAC-approved sealants for air sealing
- Vent baffles, access hatch insulation, and protective gear for technicians
Expected energy savings and comfort improvements
- Most homes with inadequate insulation see meaningful savings in cooling and heating costs after a complete attic upgrade. Typical reductions in seasonal energy use range from 10 to 20 percent, depending on current insulation levels, air sealing quality, and HVAC efficiency.
- Benefits include fewer hot or cold rooms, reduced HVAC cycle frequency, improved humidity control, and lower peak demand during North Texas summer heat.
Common preparation and safety considerations
- Ensure attic is cleared of fragile items along the perimeter before service day. Technicians will still avoid stored boxes and personal belongings when possible.
- Older homes may have wiring, knob-and-tube, or potential asbestos-containing materials; a professional inspection flags these issues and recommends safe remediation before insulation.
- Maintain clearance around recessed lights, flues, and chimneys as required by code; technicians follow safety clearances and can retrofit fire-safe covers where needed.
- Blown-in insulation can create dust. Home occupants with respiratory sensitivities should plan to avoid the home or bedroom areas during installation day if advised by the technician.
Warranty and maintenance guidance
- Installed insulation performance is long lasting, but blown-in materials can settle slightly over years. Expect periodic attic checks every 3 to 5 years after installation to confirm depth and look for moisture or pest issues.
- Manufacturer warranties often cover the insulation product; professional installation carries a workmanship warranty which should be documented. Keep installation records and depth measurements for future reference and for qualifying for rebates.
- Address attic leaks, HVAC duct problems, and ventilation issues promptly to avoid insulation degradation.
Available rebates and financing options
- Homeowners in Lowry Crossing may qualify for a mix of incentives: federal or state efficiency tax credits, utility rebates, and local programs that reward insulation upgrades. Utility providers in the region sometimes offer rebates for upgrades that reduce peak cooling demand.
- Financing options are commonly available through contractors and third-party lenders to spread project costs over time. Options may include low monthly payment plans and deferred interest offers depending on credit approval. Homeowners should request a breakdown of available incentives and financing terms during the estimate phase.
Scheduling and what to expect on installation day
- Typical project timeline starts with an on-site inspection and scope agreement. Most attic blow-in installations are completed in a single day for average-sized homes once inspection and air sealing are finished.
- Weather and attic conditions influence timing; installers coordinate to ensure proper drying conditions and safe access. Technicians will provide a pre-service checklist so the home is ready and so the team can work efficiently.
FAQs
Q: How long does blown-in fiberglass installation take?
A: For a typical single-family attic, install times range from a few hours to one full day depending on air sealing needs and attic access.
Q: Will blown-in insulation make my attic inaccessible for storage?
A: The insulation fills between joists. You can maintain storage on attic platforms or raised walkways, but boxes directly on the insulation will compress it and reduce effectiveness.
Q: Can blown-in fiberglass cause mold or trap moisture?
A: Fiberglass itself is non-organic and resists mold, but moisture from roof leaks or poor ventilation can create conditions for mold growth. Proper roof maintenance and ensuring attic ventilation are critical before adding insulation.
Q: Do I need to replace my HVAC ducts when insulating the attic?
A: Not always. However, sealing and insulating ducts in an unconditioned attic improves system efficiency. Duct repairs and sealing are commonly recommended during an attic insulation project.

Flexible Financing Options
Explore our range of flexible financing options designed to suit your needs and budget.


