


Blown-in fiberglass attic insulation is one of the most effective, cost-efficient upgrades Celina homeowners can make to lower energy bills and improve indoor comfort. With long, hot summers and humid conditions in North Texas, poorly insulated or settled attic insulation puts extra load on cooling equipment and creates uneven temperatures across living spaces.
Why blown-in fiberglass is a good fit for Celina, TX
- Fiberglass resists moisture-related deterioration better than some alternatives when installed with proper ventilation and air-sealing.
- Blown-in loose-fill fills cavities and irregular attic spaces, covering joists and around obstructions to reduce thermal bridging common in older Celina construction.
- In the Dallas–Fort Worth climate, improving attic insulation reduces cooling runtime during long summer months and lowers humidity-driven comfort issues.
Common attic insulation issues we find in Celina homes
- Settled or compressed insulation with depth below recommended R-values
- Incomplete coverage around plumbing stacks, recessed lights, and chimney chases
- Blocked soffit vents or inadequate attic ventilation causing heat buildup
- Attic bypasses and air leaks at attic hatches, ducts, and top plates
- Evidence of moisture stains or prior roof leaks that compromised insulation
Recommended R-values and insulation depths for Celina
- For Celina (DFW area), attic R-values in the range of R-38 to R-60 are commonly recommended, depending on the home’s age, HVAC sizing, and whether ducts are in the attic.
- Approximate loose-fill fiberglass depths:
- R-38 ≈ 12–14 inches
- R-49 ≈ 16–18 inches
- R-60 ≈ 20–22 inches
- A technician will measure existing depth and recommend a target based on current code guidance, energy goals, and whether additional air sealing is needed first.
How technicians assess your attic
- Visual inspection of insulation type, depth, and condition (settling, staining, mold)
- Ventilation check: soffit, ridge, gable vents and baffle integrity
- Air-leak survey: attic hatch, recessed fixtures, plumbing stacks, ductwork
- HVAC duct inspection in attic for insulation, sealing, and damage
- Moisture sources evaluated: roof leaks, plumbing, or HVAC condensation issues
- This assessment determines whether air sealing or repairs are required before adding insulation.
The blown-in installation process (step-by-step)
- Prep
- Clear attic entry path, place protective coverings in work areas, and mark access points.
- Move fragile items and ensure attic is safe for crews and equipment.
- Containment and protection
- Protect ceiling fixtures, HVAC equipment, and attic-mounted systems from dust.
- Install baffles at soffit areas to keep intake vents clear and preserve airflow.
- Air sealing and repairs (if needed)
- Seal common attic bypasses: attic hatch, top plates, gaps around vents, and recessed fixtures using appropriate materials (foam, caulk, or gaskets).
- Repair any minor roof or plumbing penetrations that threaten insulation performance.
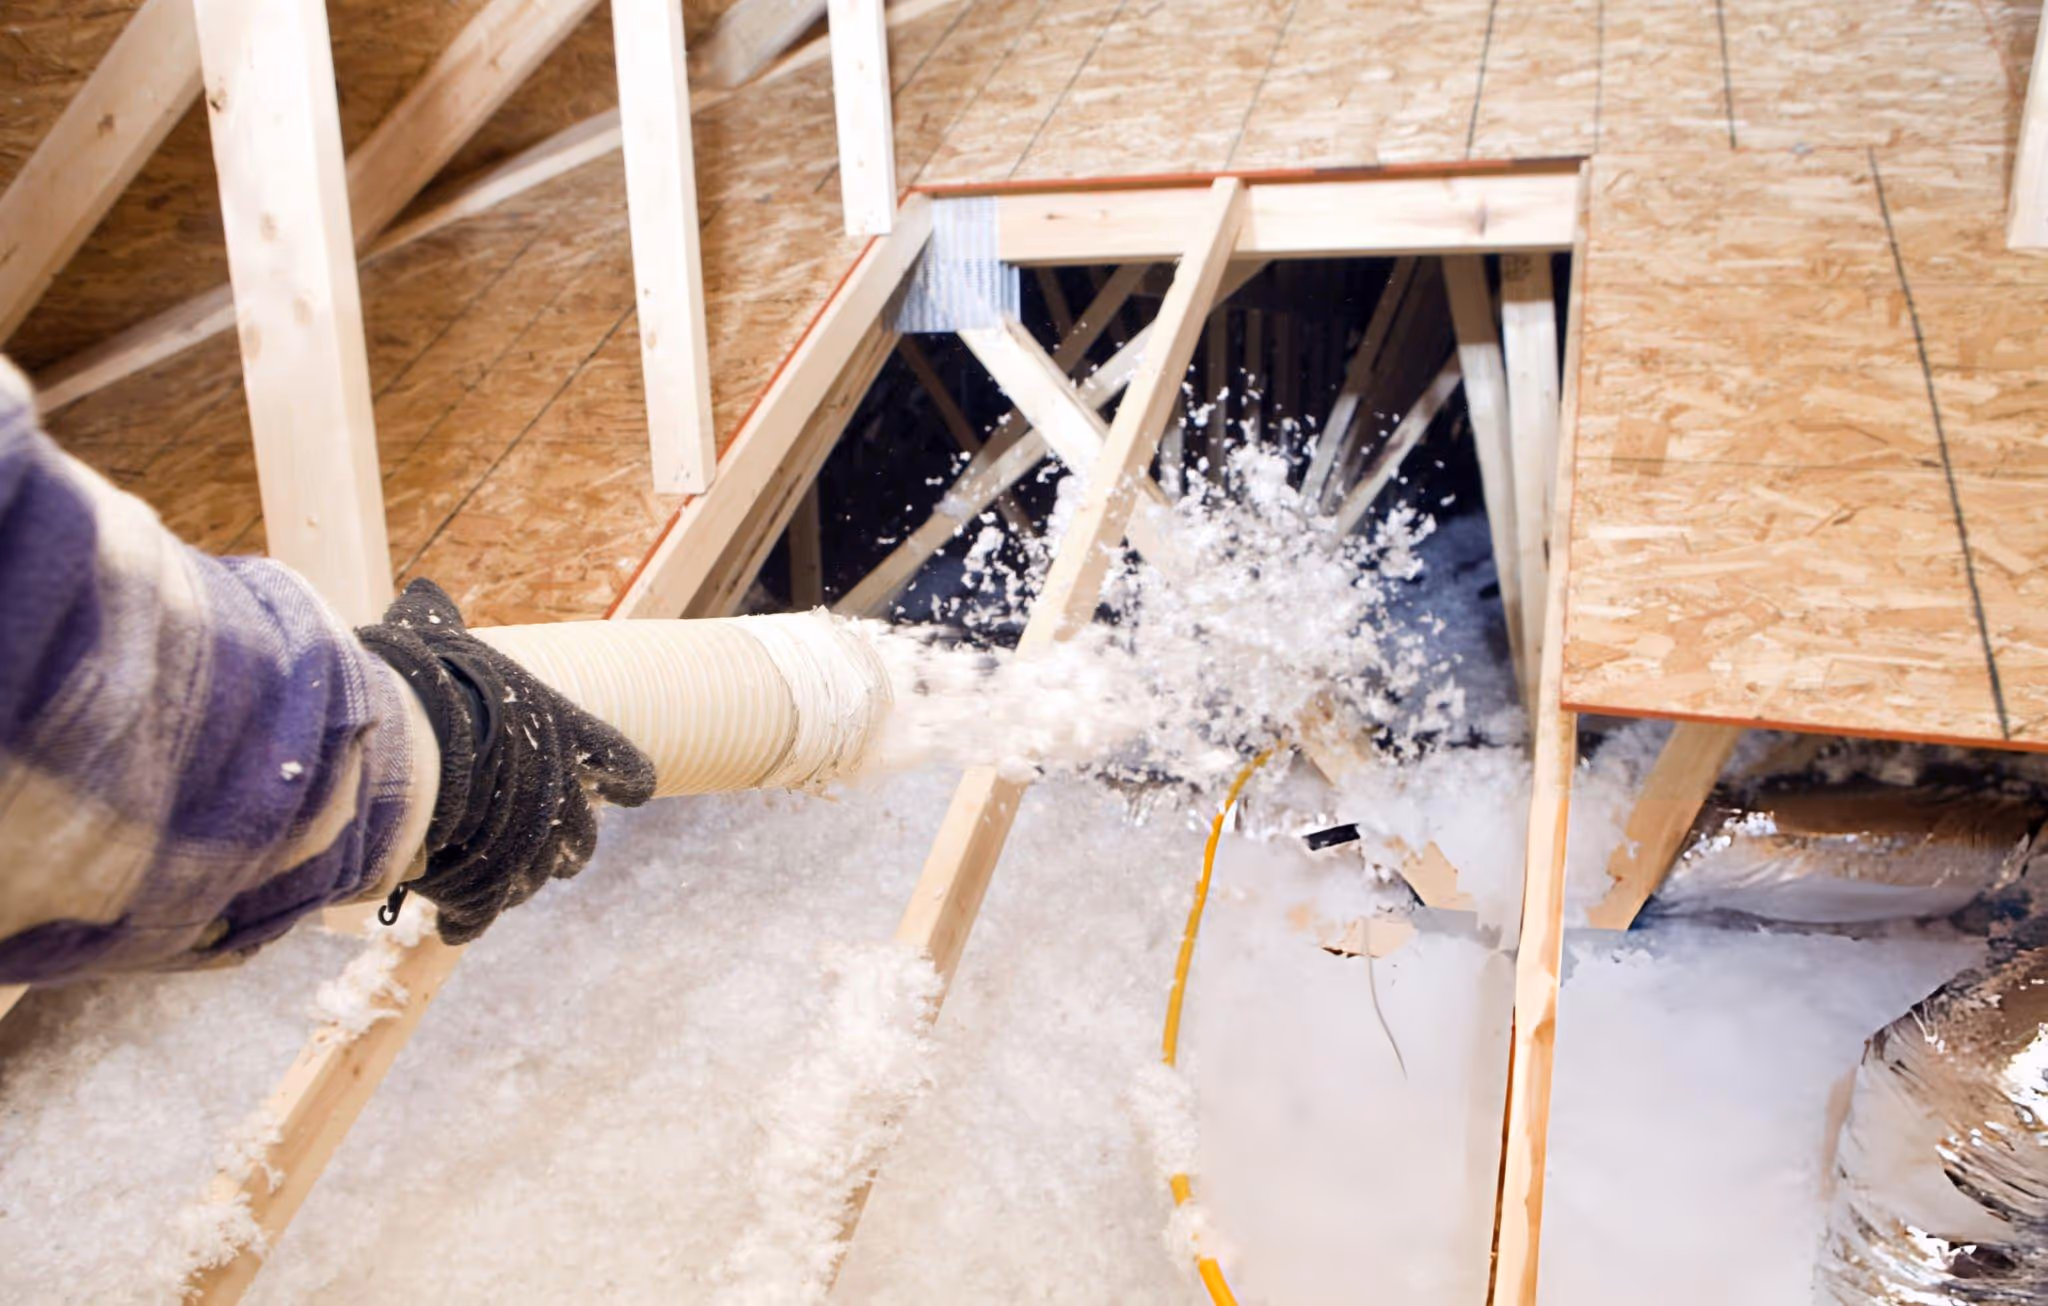
- Installation
- Feed loose-fill fiberglass from a blower machine through hoses into the attic.
- Technicians apply insulation to reach specified depth uniformly, measuring at multiple points to ensure consistent coverage and desired R-value.
- Special attention is paid to coverage over joists and around obstacles to limit thermal bridging.
- Cleanup and verification
- Remove debris, re-secure insulation baffles, and vacuum work areas as needed.
- Mark or label attic with installed R-value and depth for future reference.
- Final walk-through to verify ventilation paths remain open and insulation evenly distributed.
Air-sealing and moisture considerations specific to Celina
- Celina’s hot, humid summers make both air sealing and ventilation critical. Poor air sealing lets conditioned air and moisture escape into the attic, which can condense and create mold risks or reduce insulation effectiveness.
- Do not block soffit vents when adding insulation—use baffles to maintain continuous airflow.
- Recessed lighting and HVAC penetrations are common leakage points; sealed and insulated penetrations reduce energy loss and moisture transport.
- When moisture damage or roof leaks are present, fix the source before insulating. Fiberglass will hold moisture if the underlying issue isn’t addressed.
Expected energy savings and comfort improvements
- Homeowners typically see reduced heating and cooling costs after bringing attic insulation to modern recommended levels. Depending on current insulation, sealing quality, and HVAC efficiency, expect energy savings in the general range of 10–20% on heating and cooling.
- Comfort benefits include fewer hot spots, steadier indoor temperatures, reduced strain on AC units during summer, and potentially longer HVAC equipment life due to less runtime.
Warranties and financing commonly available
- Many blown-in fiberglass products include a manufacturer warranty for R-value retention or settling. Contractors often provide a workmanship warranty covering installation quality for a defined period.
- Financing options are commonly available through home improvement lenders or contractor programs to help spread project costs over time, subject to credit approval.
- Warranties vary by product and installer; confirm terms, coverage length, and any maintenance requirements that keep the warranty valid.
Maintenance and inspection guidance
- Inspect your attic annually or after major storms. Look for signs of settling, pests, stains, or new air leaks.
- Re-measure insulation depth or use thermal imaging to detect voids or areas needing additional fill.
- Check ventilation openings and baffles to ensure soffit-to-ridge airflow is unobstructed.
- If you notice high humidity, odors, or visible mold, address moisture sources quickly and replace or dry impacted insulation if necessary.
- Consider a blower-door or thermal scan every few years after major changes to validate envelope performance.
FAQs
Q: How long does blown-in fiberglass insulation last?
A: Properly installed fiberglass insulation can last for decades, but performance depends on maintaining dry conditions, good ventilation, and preventing compression or disturbance.
Q: Will adding blown-in insulation require replacing my HVAC system?
A: Not usually. Proper insulation and air sealing often reduce HVAC load. In some cases, significantly reducing load may reveal an oversized system; a professional assessment can determine if any HVAC adjustments are needed.
Q: Can blown-in insulation be added over existing insulation?
A: Yes. Blown-in loose-fill is commonly added over existing fiberglass or cellulose if the underlying insulation is dry and mold-free. The attic should be inspected first and any air leaks sealed.
Q: Will insulation block attic vents?
A: When installed correctly, insulation will not block vents. Installers use baffles at eaves and soffits to preserve intake airflow and prevent insulation from covering vent openings.
Q: How long does the installation take?
A: Typical single-family home attic installations are often completed in one day, depending on attic size, prep work, and any necessary repairs or air sealing.

Flexible Financing Options
Explore our range of flexible financing options designed to suit your needs and budget.


