


Attic blow-in insulation is one of the fastest, most cost-effective ways to reduce energy bills, improve comfort, and protect your home’s HVAC system. For Aubrey, TX homes—where hot, humid summers and occasional cold snaps create large attic heat loads—upgrading to fiberglass blown-in insulation reduces attic heat transfer, lowers cooling demand, and helps even out indoor temperatures.
Why blown-in fiberglass is a good fit for Aubrey, TX
- Fiberglass loose-fill fills irregular joist bays and settles less than older batt installations, making it ideal for attics with obstructions, wiring, and ductwork.
- It performs well in hot climates by slowing heat flow into the living space and reducing the runtime of air conditioners during Aubrey’s long summers.
- When combined with proper air sealing and balanced ventilation, it reduces humidity-related issues and lowers cooling costs.
Common attic problems we see in Aubrey, TX homes
- Inadequate R-value: many older houses have R-11 to R-19 in attics, too low for our climate.
- Air leakage around recessed lights, attic stairs, and duct penetrations that make insulation less effective.
- Poor ventilation or blocked soffit vents leading to trapped heat and moisture.
- Settled or degraded insulation (especially cellulose) that no longer meets current R-value recommendations.
Initial attic assessment and recommended R-values
A professional assessment should include measuring current insulation depth, looking for gaps, checking ductwork, and detecting moisture or pest damage. For Aubrey, TX:
- Recommended target attic R-value: R-38 to R-60 depending on your starting point and budget.
- Typical retrofit target: bring existing attic up to at least R-38 (about 10 to 14 inches of blown fiberglass depending on product).
- For new builds or homeowners seeking maximum long-term savings, R-49 to R-60 may be recommended.
Air sealing and prep work (what happens before blowing)
- Identify and seal air leaks at attic floor penetrations: attic access, plumbing stacks, chimneys, recessed lighting, and duct boots.
- Install attic access insulator box or gasket to minimize leakage through pull-down stairs.
- Repair roof leaks, replace rotted sheathing, and address active pest issues before installing insulation.
- Install rafter or baffle ventilation chutes at soffits to maintain airflow from soffit to ridge vents.
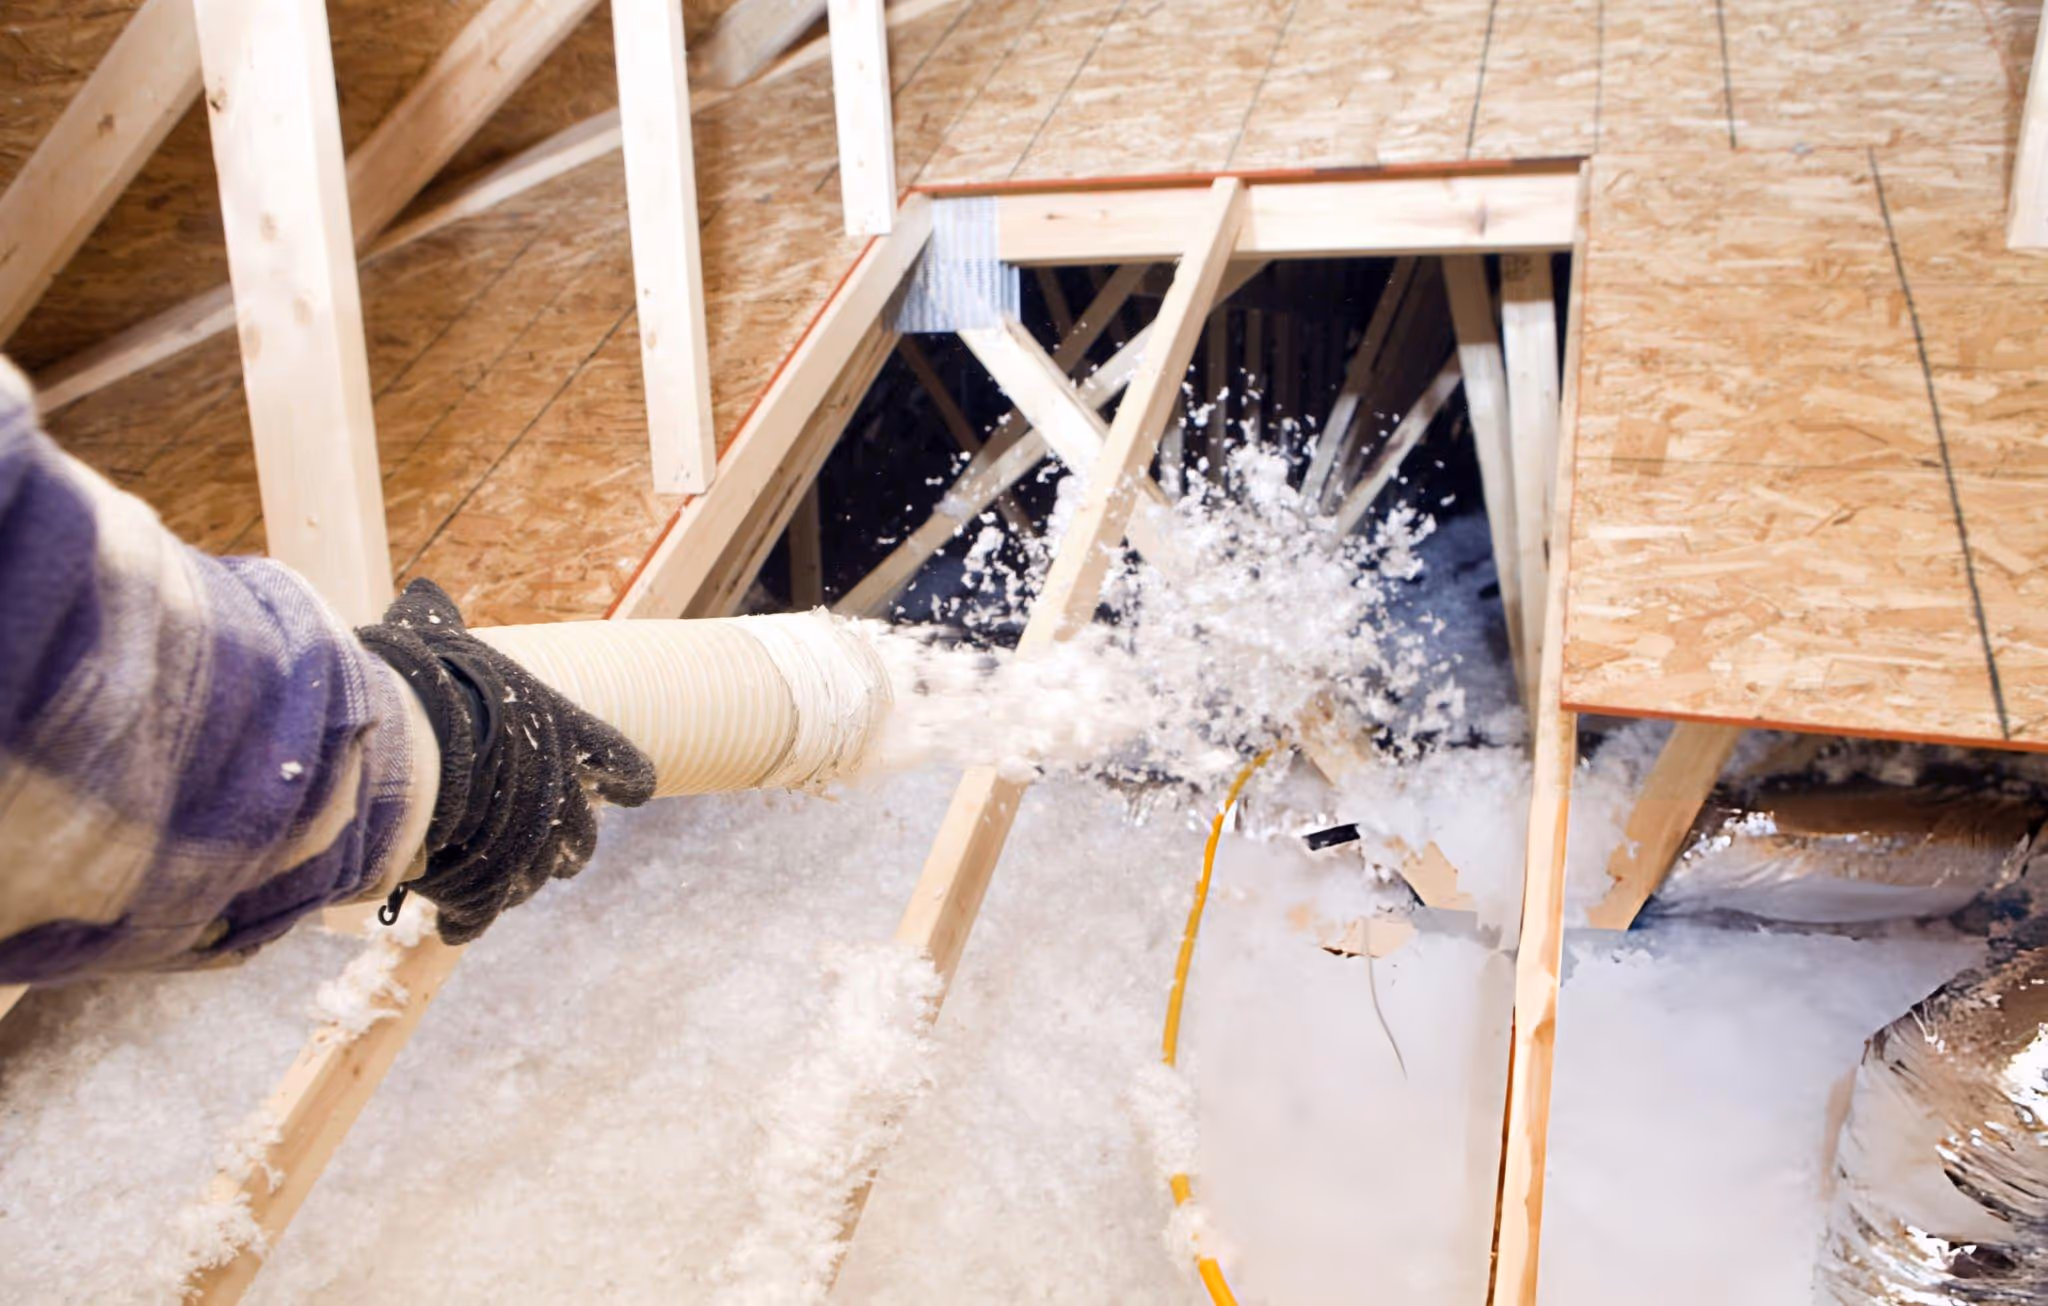
Blown-in insulation installation steps and materials used
- Materials: loose-fill fiberglass insulation (brand-neutral), typically R-value per inch ~2.2 to 2.7 depending on product.
- Installation process:
- Place protective coverings and set up insulation blower (outside or in garage).
- Mark desired depth at regular intervals with depth markers.
- Blow insulation evenly across the attic floor, working from the furthest point back toward the attic access to avoid re-trafficking.
- Build up insulation to the target depth, keeping required clearances around chimneys and recessed fixtures.
- Replace or install baffles at soffit entries and ensure ventilation pathways remain open.
- Finish by insulating attic access and checking depth consistency.
Ventilation and moisture considerations
- Balanced attic ventilation is essential in Aubrey to prevent moisture buildup and limit heat transfer: aim for intake at soffits and exhaust at ridge or roof vents.
- Standard ventilation ratio guidance typically recommends about 1 square foot of vent area per 300 square feet of attic floor for balanced systems, adjusted when vapor barriers or other conditions apply.
- In hot-humid climates, avoid closing off vent paths; ventilation plus air sealing at the attic floor provides the best results.
- Address moisture sources (bath vents, dryer vents, kitchen ranges) so those exhausts do not vent into the attic.
Expected energy savings and indoor comfort benefits
- Typical savings: homeowners in the North Texas area often see cooling and heating energy reductions in the range of 10 to 30%, depending on initial insulation levels, air sealing quality, HVAC efficiency, and home occupancy patterns.
- Faster, more consistent cooling with reduced HVAC runtime helps extend equipment life and lowers maintenance needs.
- Blown-in fiberglass does not absorb moisture easily and maintains performance over time when installed with proper ventilation.
Pricing and financing options (general guidance)
- Costs depend on attic size, access difficulty, existing insulation, and any required air-sealing or repairs.
- Typical retrofit ranges vary; exact quotes should be provided after an attic assessment. Many homeowners choose to finance energy upgrades; financing options commonly available include home improvement loans, energy-efficiency financing programs, or contractor financing plans.
- Consider long-term savings when evaluating payback—the combined reduction in utility bills and HVAC strain often makes insulation a cost-effective improvement over time.
Warranty and maintenance recommendations
- Materials: fiberglass products often carry limited manufacturer warranties covering manufacturing defects; warranty length varies by brand.
- Workmanship: reputable installers provide a workmanship warranty on installation; ask about coverage duration and what it includes.
- Maintenance: inspect the attic annually (or after severe storms) to check insulation depth, moisture signs, pest activity, and to ensure vents remain clear. Replace or top-up insulation where settling or compression has occurred.
Before and after examples
- Example 1: Older ranch home with R-11 batts upgraded to R-38 blown-in fiberglass. Result: cooler upstairs rooms, HVAC cycles shortened, estimated 15 to 20% reduction in cooling costs during peak summer months.
- Example 2: Newer home with uneven insulation and air leaks sealed before adding blown-in insulation to reach R-49. Result: improved humidity control in attic, fewer hot spots on second floor, and reduced duct leakage impact.
FAQs
Q: How long does blown-in fiberglass installation take?
A: Most single-family attics are completed in a half-day to one day depending on attic size and prep work required.
Q: Will blown-in fiberglass settle over time and lose R-value?
A: Properly installed fiberglass settles minimally. Manufacturers account for expected settling, and installers use depth marks to achieve target R-values after settling.
Q: Do I need to remove old insulation before blowing in new fiberglass?
A: Not always. Old insulation should be removed if it is wet, contaminated with pests, or moldy. Clean, dry insulation can often remain and be topped up.
Q: Can insulation fix my high energy bills by itself?
A: Insulation is a major factor but works best combined with air sealing, duct sealing, and HVAC maintenance. A comprehensive approach yields the best results.
Q: Is blown-in fiberglass safe for my attic?
A: Fiberglass is noncombustible and commonly used in residential attics. Installers use safety protocols to protect HVAC components and maintain required clearances around heat-producing fixtures.
Q: How soon will I see savings on my energy bill?
A: Many homeowners notice improved comfort immediately; measurable bill savings typically appear within the first billing cycle after installation, depending on seasonal usage.
Q: What should I do about ventilation in my attic before installation?
A: Have soffit and ridge venting inspected. Install baffles to keep airflow paths clear and ensure vents are not blocked by insulation.

Flexible Financing Options
Explore our range of flexible financing options designed to suit your needs and budget.


